What Is Paint Correction?
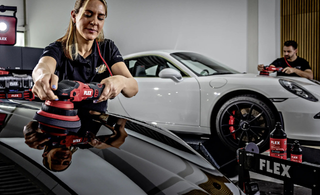
Paint correction is the process of mechanically removing defects from a vehicle's clear coat using a machine polisher, abrasive compounds, and polishing pads. It is the most effective way to restore paintwork that has become dull, swirled, or scratched over time.
Unlike waxes or glazes that fill and mask defects temporarily, paint correction permanently removes them by levelling the clear coat — leaving a flawless, high-gloss finish that reflects light evenly.
Common Paint Defects Paint Correction Can Fix
- Swirl marks — fine circular scratches caused by improper washing technique
- Buffer trails — holograms left by rotary polishers used incorrectly
- Light scratches — surface-level marks that haven't penetrated through the clear coat
- Water spot etching — mineral deposits that have etched into the clear coat
- Oxidation — dull, chalky paint caused by UV exposure over time
- Bird drop etching — chemical damage from acidic bird droppings left on paint
Understanding the Stages of Paint Correction
Stage 1 — Enhancement Polish
A single-stage polish using a mild compound and a finishing or light cutting pad. Removes light swirls and enhances gloss without significantly reducing clear coat thickness. Ideal for well-maintained vehicles with minor defects.
Stage 2 — Two-Stage Correction
Involves a cutting stage (heavier compound + cutting pad) followed by a finishing stage (fine polish + finishing pad). Removes moderate to heavy swirls, scratches, and oxidation. The most common professional correction process.
Stage 3 — Heavy Correction
Used for severely neglected or heavily scratched paintwork. May involve wet sanding before machine polishing. Best left to experienced detailers as it removes significant clear coat material.
Choosing the Right Machine Polisher
- Dual Action (DA) Orbital Polisher — the safest option for beginners and enthusiasts. The random orbital motion reduces the risk of burning through paint. Ideal for stages 1 and 2.
- Rotary Polisher — more aggressive and faster cutting, but requires experience to use safely. Best for heavy correction and professional use.
- Mini Polisher — a smaller DA polisher for tight areas like door handles, bumpers, and pillars.
Choosing the Right Compound and Pad Combination
The compound and pad pairing determines how aggressively you cut into the clear coat:
- Heavy cut compound + wool or foam cutting pad — maximum defect removal for severe paint
- Medium cut compound + foam cutting pad — removes moderate swirls and scratches efficiently
- Fine polish + finishing pad — refines the finish after cutting, removes light haze
- All-in-one polish — cuts, polishes, and protects in a single step; ideal for light correction
The Paint Correction Process
- Decontaminate the paint — wash, chemically decontaminate, and clay bar before starting
- Inspect the paint — use a paint depth gauge and inspection light to assess defects
- Tape off trim and rubber — protect non-paint surfaces from compound residue
- Prime your pad — apply a small amount of compound to the pad before starting
- Work panel by panel — apply compound, spread at low speed, then increase speed and work in overlapping passes
- Wipe residue — remove compound residue with a clean microfibre cloth after each panel
- Inspect under lighting — check your work with an inspection light before moving on
- Follow up with a finishing polish — refine the surface after cutting
- Apply protection — always seal corrected paint with a wax, sealant, or ceramic coating immediately after
Important Tips
- Always work in a shaded area or indoors — direct sunlight makes it impossible to see defects clearly
- Keep your pad clean — a clogged pad loses cutting ability and can cause damage
- Use a paint depth gauge — never correct paint that is too thin to safely remove material from
- Less is more with compound — start with a small amount and add more if needed
Final Thoughts
Paint correction is one of the most rewarding skills in detailing — the transformation from swirled, dull paint to a mirror-like finish is remarkable. With the right machine, compounds, and pads, even a beginner can achieve impressive results. Always follow up with a quality paint protection product to preserve your hard work.
Shop Paint Correction Products
Everything you need for professional paint correction:
- ShineMate EX620 6/21: 6" Orbital Polisher — versatile DA polisher for all correction stages
- ShineMate EX620 6/15: 6" Orbital Polisher — ideal for finishing and light correction
- ShineMate Cordless DA Polisher EB351-5/15 — cordless freedom for flexible detailing
- ShineMate Cordless DA Polisher EB351-3/12 — compact cordless polisher for tight areas
- EX603: 3" Mini Orbital Polisher — perfect for bumpers, pillars, and tight panels
- ShineMate EP803K: Rotary Polisher Kit — professional rotary for heavy correction
- Rupes DA Coarse High Performance Compound — aggressive cutting compound for heavy defects
- Rupes Coarse Abrasive Compound Gel — gel formula for controlled cutting
- Rupes DA Fine High Performance Compound — fine polish for refining after cutting
- Koch Chemie Heavy Quick Cut B9.01 — fast-cutting compound for efficient defect removal
- Zvizzer Speed Polish: Cut, Finish and Protect — all-in-one polish for light correction and protection
- ZviZZer Orbital Polishing Combo — complete pad and compound combo kit
- Lake Country HDO CCS Finishing Pad 5" — premium finishing pad for a flawless final polish
- Zvizzer UFO Pad Red: Finishing Pad 6" — ultra-fine finishing pad for maximum gloss
- Rupes DA Coarse Wool Polishing Pad 5" — aggressive wool pad for heavy defect removal