What Is a Contact Wash?
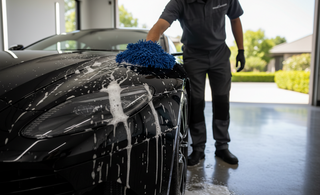
A contact wash is the stage of the wash process where you physically touch the vehicle's paintwork using a wash mitt or wash pad. It follows the prewash stage, which removes the bulk of heavy contamination without contact. By the time you reach the contact wash, the surface should already be significantly cleaner and safer to touch.
Done correctly, a contact wash removes the remaining fine dirt and grime while minimising the risk of inflicting swirl marks and scratches on your paint.
The Two Bucket Method
The two bucket method is the gold standard for a safe contact wash. It uses two separate buckets:
- Wash bucket — filled with water and your chosen car shampoo
- Rinse bucket — filled with clean water only
After washing each panel, you rinse your mitt in the rinse bucket before reloading it with fresh shampoo solution. This prevents dirty, grit-laden water from being dragged back across your paint — the primary cause of wash-induced swirl marks.
A grit guard placed at the bottom of each bucket traps dirt below the waterline, keeping your mitt as clean as possible throughout the wash.
Choosing the Right Shampoo
Your choice of shampoo matters. For most vehicles, a pH-neutral, high-lubricity shampoo is ideal — it provides excellent glide for the mitt and is safe for waxes, sealants, and ceramic coatings. Options include:
- Standard pH-neutral shampoos — safe for all protection types, great everyday choice
- Ceramic shampoos — contain SiO2 to top up and enhance existing ceramic coatings
- Wash & coat shampoos — leave a light protective layer with every wash
- Degreasing shampoos — stronger formula for heavily soiled vehicles, strip waxes and sealants
How to Contact Wash Correctly
- Complete your prewash and rinse the vehicle thoroughly first.
- Set up your two buckets with grit guards in each.
- Mix your shampoo in the wash bucket according to the product's dilution ratio.
- Start at the roof and work your way down, washing the cleanest panels first.
- Use straight, overlapping strokes — never circular motions which can cause swirls.
- Rinse your mitt in the rinse bucket after every panel before reloading with shampoo.
- Wash the lower panels and sills last — these are the dirtiest areas.
- Rinse the vehicle thoroughly from top to bottom once complete.
Drying Your Vehicle
After rinsing, dry the vehicle immediately to prevent water spots — especially important in South Africa's warm climate. Use a large, plush microfibre drying towel or a dedicated car dryer blower. Never use household towels or chamois leathers, which can scratch the paint.
Common Contact Wash Mistakes to Avoid
- Washing in direct sunlight — shampoo dries too quickly and leaves residue
- Using one bucket only — reintroduces grit to the paint
- Applying too much pressure — let the mitt and shampoo do the work
- Washing from bottom to top — always start at the roof
- Using a dirty or contaminated mitt — inspect and wash your mitt regularly
Final Thoughts
The contact wash is where most paint damage occurs — but it doesn't have to. With the right products, the two bucket method, and a quality wash mitt, you can achieve a flawless, swirl-free finish every time. Pair it with a proper prewash and your paint will stay looking showroom-fresh for longer.
Shop Contact Wash Products
Everything you need for a safe, professional contact wash:
- Microfibre Wash Mitt — ultra-soft, high-pile mitt for scratch-free washing
- Chicken Feet Microfibre Wash Mitt — finger-design mitt for superior dirt-trapping and glide
- Micron Wash Mitt — premium microfibre mitt for a gentle, safe wash
- Microfibre Wash Pad — flat pad alternative for panel-by-panel washing
- High Foam Car Wash Shampoo — high-lubricity pH-neutral shampoo for all paint types
- Fra-Ber Neve High Foam Active Car Shampoo — professional-grade high foam shampoo
- Zvizzer Allround Shampoo — versatile high foam shampoo for regular maintenance washes
- Innovacar S1 Wash & Coat Shampoo — adds a protective layer with every wash
- Bersolwax Ceramic Shampoo — SiO2-infused shampoo to top up ceramic coatings
- 20L Wash Bucket 3-in-1 Kit — complete bucket setup with grit guard and lid
- Innovacar Grit Guard Insert — keeps dirt trapped at the bottom of your bucket
- Car Wash Starter Kit — everything you need to get started
- Basic Wash Kit — essential wash kit for beginners
- Advanced Wash Kit — step up your wash routine with a complete advanced kit